
The good news: bathing independently with a disability is achievable. It requires the right combination of equipment, environment prep, and technique — not superhuman strength or a full bathroom renovation.
This guide walks through the equipment you need, a step-by-step entry method, what factors affect success, and when a standard tub simply isn't the right long-term tool.
Key Takeaways
- Adaptive aids — grab bars, non-slip mats, and transfer benches — make safe tub entry possible without assistance
- Preparation prevents most accidents; equipment placement matters as much as technique
- The right method depends on your disability type and which body parts you can still use
- Standard tubs have real limits — walk-in tubs eliminate the step-over motion entirely
- An occupational therapist (OT) can assess your bathroom and recommend the right setup for your needs
What You Need Before Getting Into the Bathtub
Preparation prevents most bathroom injuries. Before attempting any tub entry, two things need to be in place: equipment and environment.
Essential Equipment
The core adaptive aids most people need:
- Wall-mounted grab bars: Install these near the tub entry point and along the inside wall — they serve as your primary anchor during every phase of transfer. Bars must be anchored into wall studs or with rated anchors. ADA-compliant assemblies must resist 250 lb of force, which a rim-clamp bar simply cannot match.
- Non-slip bath mat: Place one inside the tub and one on the floor outside. A wet tub surface is far more slippery than it looks during a transfer.
- Handheld showerhead: Allows washing while seated, so there's no need to stand up mid-bath.
Depending on your mobility level, you may also need:
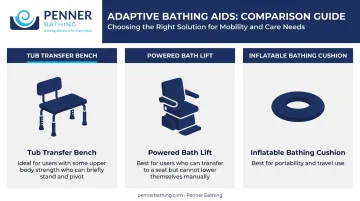
| Aid | Best For |
|---|---|
| Tub transfer bench | Those with some upper body strength who can briefly stand and pivot |
| Powered bath lift | Those who can transfer to a seat but cannot lower themselves manually |
| Inflatable bathing cushion | Portable alternative to a powered lift; useful for travel |
Environment and Safety Checks
Before you start, run through this checklist:
- ✅ Water drawn to the correct temperature before entry — CPSC recommends setting water heaters to 120°F to prevent scald injuries
- ✅ Clear path to the tub — no rugs, no obstacles
- ✅ Towels, soap, and everything else within arm's reach from inside the tub
- ✅ Phone or emergency pull cord accessible from the tub
If you're unsure which aids are right for your space, consult an occupational therapist before buying or installing anything permanently. They assess your function, your bathroom layout, and which combination of aids will actually work together.
How to Get Into a Bathtub With a Disability: Step-by-Step
This section covers the transfer bench method — the most accessible technique for people with some upper body strength who can stand briefly. Those using a bath lift or walk-in tub follow a simpler process covered in the next section.
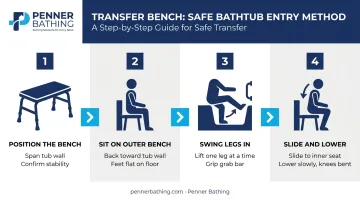
Step 1: Position the Bench and Prepare Your Entry
Set the transfer bench so two legs sit inside the tub and two sit outside, with the seat spanning the tub wall. Confirm it's locked and stable before putting any weight on it.
Wear bare feet or non-slip socks, not slippers. Before sitting, make sure one hand is already on the grab bar.
Step 2: Sit on the Outer Portion of the Bench
Sit on the outside section of the bench with your back toward the tub wall. Keep both feet flat on the floor outside the tub. Use the grab bar for stability throughout.
Rushing this step is the most common cause of losing balance. The goal is a controlled, deliberate seated pivot, not a quick swing.
Step 3: Swing Your Legs Into the Tub
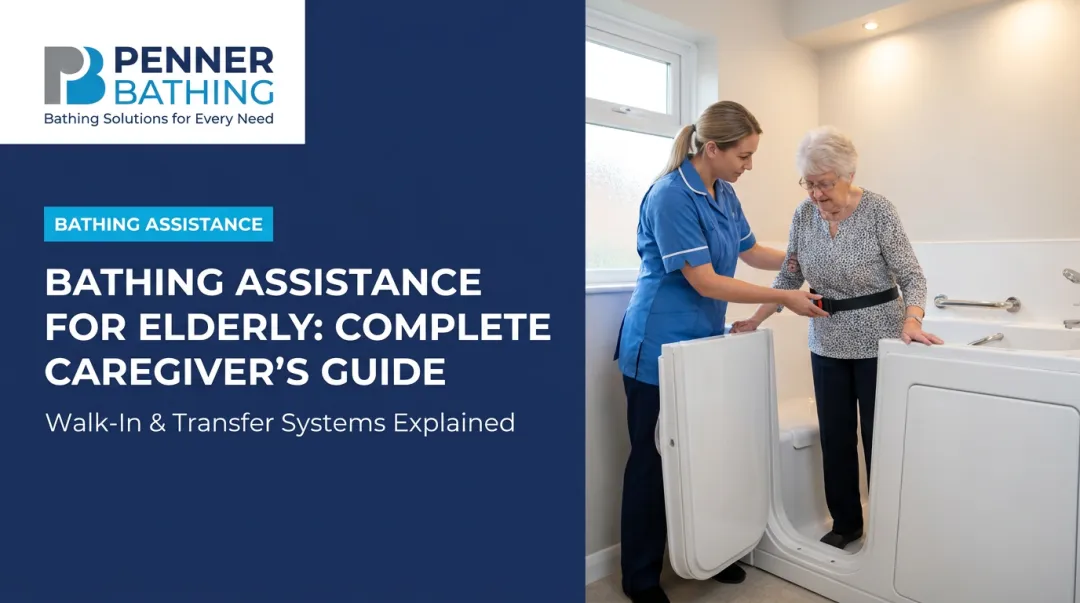
Lift one leg at a time over the tub wall onto the non-slip mat inside. Use the grab bar for support with each lift. If you cannot easily lift your own legs, a leg lifter strap looped around your foot lets your arms do the work. This approach is a standard technique in post-surgical rehabilitation protocols.
Once both legs are inside, slide along the bench toward the inner seat position, keeping your weight low and centered.
Step 4: Lower Into the Tub — and Plan Your Exit Before You Descend
If you want to sit on the tub floor rather than remain on the bench: grip the grab bar, lower slowly, and keep your knees bent. Many people with disabilities choose to stay on the bench, which is often the safer choice.
Before you lower yourself at all, think through your exit. CDC data shows tub exit causes more than 4 times as many injuries as entry, and research consistently shows that grab bars significantly improve balance recovery on the way out. Never attempt to exit if you feel fatigued.
Factors That Affect How Well These Methods Work
Results vary significantly from person to person. Three variables matter most:
Disability type and upper body strength. Someone with paraplegia but strong arms will manage a transfer bench far more easily than someone whose arthritis or muscle weakness affects both upper and lower body. Select the entry method based on which body parts retain strength and control — not just what seems simplest.
Tub wall height. Standard tub walls vary considerably in height. Even a few extra inches can make a technique unsafe or impossible for a given person. Measure your tub wall before selecting any aid — what works in one bathroom may not work in another.
Bathroom layout and space. A cramped bathroom may not allow a transfer bench to be positioned correctly, or may not leave enough room to complete the leg swing safely. An occupational therapist can evaluate all three of these factors together — your mobility, your tub, and your space — before you spend money on equipment that may not fit your situation.
Common Mistakes That Can Lead to Injury
- Skipping the non-slip mat. A wet tub surface — especially under a transfer bench leg — is far more treacherous than it looks. Without a mat, even a slow, careful transfer can turn dangerous.
- Rushing the transfer. Every movement during the seated pivot should be deliberate and slow. Moving too fast is the most reliable way to lose control mid-transfer.
- Using improperly installed grab bars. A bar that pulls away from the wall is more dangerous than no bar at all. Anchoring into studs matters — a 2024 study found that none of 20 older adults could install a rim-mounted rail that passed a 280 N safety test, making temporary clip-on rails a poor substitute for properly mounted bars.
- Going solo before practicing with supervision. A caregiver or therapist should be present for the first several attempts with any new technique or equipment.
When a Standard Tub Isn't Enough: Accessible Bathing Alternatives
For people with significant mobility limitations — full-time wheelchair users, or those who've had near-falls — adaptive aids applied to a standard tub may not be sustainable long-term. Purpose-built solutions offer a safer, more dignified answer.
Bath Lifts and Bathing Cushions
Powered bath lifts remove the need for a manual transfer altogether. The user transfers onto a motorized seat at the tub rim; the seat lowers them into the water and raises them back up for exit.
- Powered bath lifts: approximately $450–$1,630 across major brands
- Inflatable bathing cushions (such as the Mangar): approximately $781–$1,039, with a 336 lb capacity and the advantage of being portable for travel
Powered lifts are more stable for regular home use; cushions are better if portability matters.
Walk-In Tubs: The Purpose-Built Solution
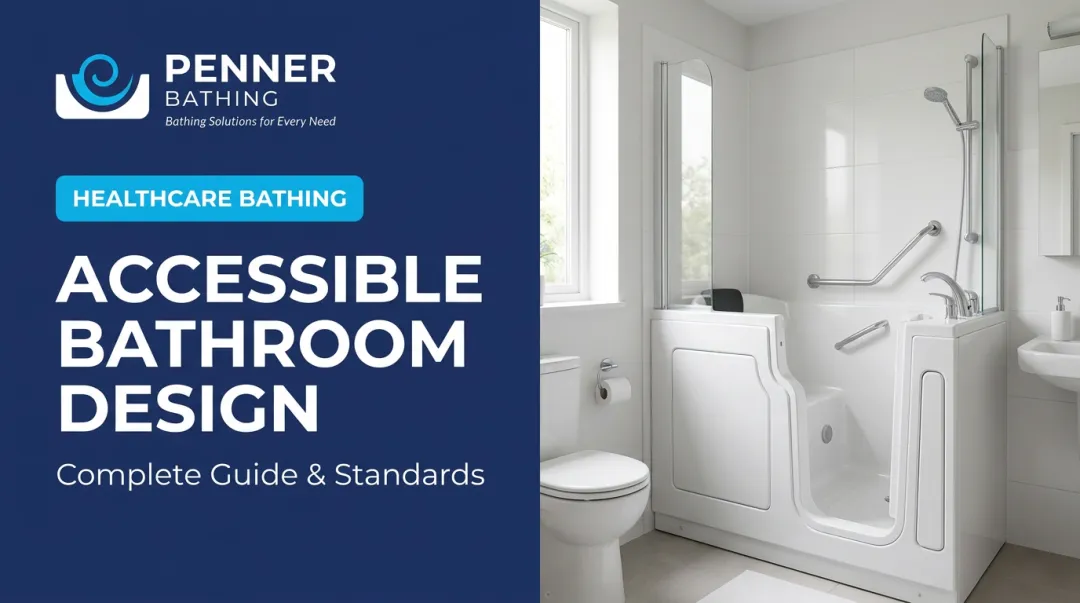
A walk-in tub has a watertight door built into the side wall. The user opens the door, steps in over a minimal threshold — typically 2–3 inches, versus the 14+ inch wall of a standard tub — then sits on a built-in seat, closes the door, and fills from a seated position. No step-over motion required.
Key features to look for:
- Low step-in threshold (2–3 inches)
- Built-in seat with safety bars at the entrance
- Anti-slip flooring
- Handheld shower wand for seated washing
- Optional hydrotherapy jets for muscle and joint relief
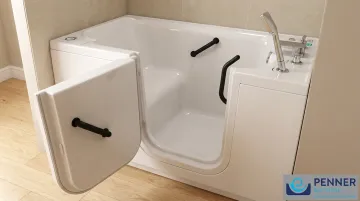
Penner Bathing's Dream Spa Walk-In Bath was designed specifically for residential independent use. Its signature wide swing-out door lets users sit on the edge first, then swing their legs in — unlike competitor models with inward-opening doors that don't allow seated entry.
The tub includes a safety bar at the entrance, ergonomic interior hand grips, a handheld shower wand, and a heated seat that keeps users comfortable during fill and drain periods. Penner has built bathing systems for long-term care facilities and hospitals for over 40 years, and the Dream Spa brings that same engineering background into a residential format.
One practical note: with any walk-in tub, you must enter before filling and wait for the tub to drain before exiting. Models with faster drain technology reduce this wait considerably.
Roll-In Showers and Wet Rooms
For users who cannot or prefer not to use a bathtub, a roll-in shower — zero-threshold, wheelchair accessible, with ADA-standard compartment dimensions of at least 30 by 60 inches — is the most accessible option available. It eliminates the bathing transfer entirely. The trade-off: no therapeutic soak.
Frequently Asked Questions
How can a disabled person have a bath?
A disabled person can bathe using adaptive aids — a transfer bench, grab bars, and a bath lift — with a standard tub, or by switching to a walk-in tub with a side door that allows seated entry. The right approach depends on the nature and severity of their mobility limitation.
What is the safest way to get out of a bathtub if you have limited mobility?
Exit reverses entry: slide to the bench edge or use a lift to rise, swing legs over the wall one at a time while gripping a grab bar, and stand only when both feet are flat on the non-slip mat outside. If you feel fatigued, rest first — exit falls occur more often than entry falls.
What equipment helps someone with a disability bathe independently?
Core aids include wall-mounted grab bars, a non-slip bath mat inside and outside the tub, a transfer bench or bath lift, and a handheld showerhead. The right combination depends on which body parts retain strength and function — there's no universal setup.
Can a walk-in tub be used without assistance?
Yes — that's what they're designed for. The user opens the door, steps in over the low threshold, sits, closes the door, and controls filling and draining from the seat. No caregiver is required for most users.
Can a non-disabled person use accessible bathing equipment?
Accessible bathrooms and equipment — walk-in tubs, grab bars, shower seats — carry no restrictions and can be used by anyone. Accessible design benefits people of all abilities.
Does Medicare or insurance cover walk-in tubs or bath safety equipment?
Original Medicare does not cover walk-in tubs, bath lifts, or grab bars, classifying them as convenience items. Some Medicare Advantage plans and VA HISA grants (up to $6,800 for service-connected conditions) may contribute. HSA and FSA funds apply when a physician documents medical necessity.